Hero Mechanics
Big shout out to Dawar and leveraging content created.
Whenever you attack—or are attacked by—another player or a monster, a battle takes place between your heroes and the troops under their command.
Two groups of attributes influence the outcome:
- Squad-building attributes: hero stats, levels, lineup bonuses, gear, skills, and Honor Hall bonuses.
- Sanctuary-development attributes: the Raven, technologies, Curios, decorations, and soldiers.
Together, these attributes determine the victor and the number of lightly wounded, severely wounded, and lost soldiers on each side.
The primary purpose of this guide is to explain squad building. Additional information about sanctuary-development bonuses and their effects on combat will be added as it becomes available.
Lorem ipsum dolor sit amet, consectetur adipiscing elit, sed do eiusmod tempor incididunt ut labore et dolore magna aliqua. Ut enim ad minim veniam, quis nostrud exercitation ullamco laboris nisi ut aliquip ex ea commodo consequat. Duis aute irure dolor in reprehenderit in voluptate velit esse cillum dolore eu fugiat nulla pariatur. Excepteur sint occaecat cupidatat non proident, sunt in culpa qui officia deserunt mollit anim id est laborum.
I. Hero Stats
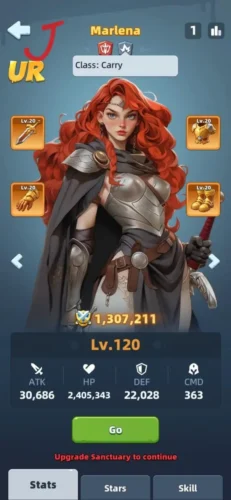
Heroes have five primary stats:
- ATK (Attack): Determines how much basic damage a hero deals. It is also used by many offensive skills. In general, higher ATK means more damage.
- HP (Health Points): Determines how much damage a hero can withstand before being defeated. HP may also affect certain defensive or support skills.
- DEF (Defense): The exact formula is currently unknown. DEF appears to reduce incoming damage before that damage is deducted from the hero’s HP.
- CMD (Command): Determines how many soldiers a hero can bring into battle. For example, a CMD value of 400 allows the hero to command 400 soldiers.
- Level: Increasing a hero’s level improves ATK, HP, DEF, and CMD. Heroes can be leveled with Antitoxin or by progressing through Expedition stages.
Secondary and Hidden Stats
Hero gear can affect six additional stats:
- Crit Rate: The chance that an attack will become a critical hit. Based on current observations, heroes may have a base Crit Rate of approximately 5%, although this value is not displayed in the detailed stats.
- Crit DMG: The damage multiplier applied to a critical hit. The base value appears to be between 150% and 200% of normal damage, but this has not been confirmed.
- Crit Rate Taken: Appears to reduce an enemy’s chance of landing a critical hit. More testing is required.
- Crit DMG Taken: Appears to reduce the damage received from critical hits. More testing is required.
- Physical DMG RES: Reduces incoming physical damage.
- Energy DMG RES: Reduces incoming energy damage.
II. Hero Classes and Factions
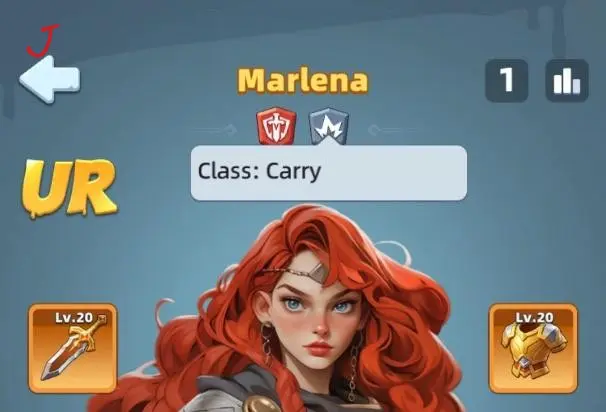
Heroes belong to one of three classes and one of three factions.
Hero Classes
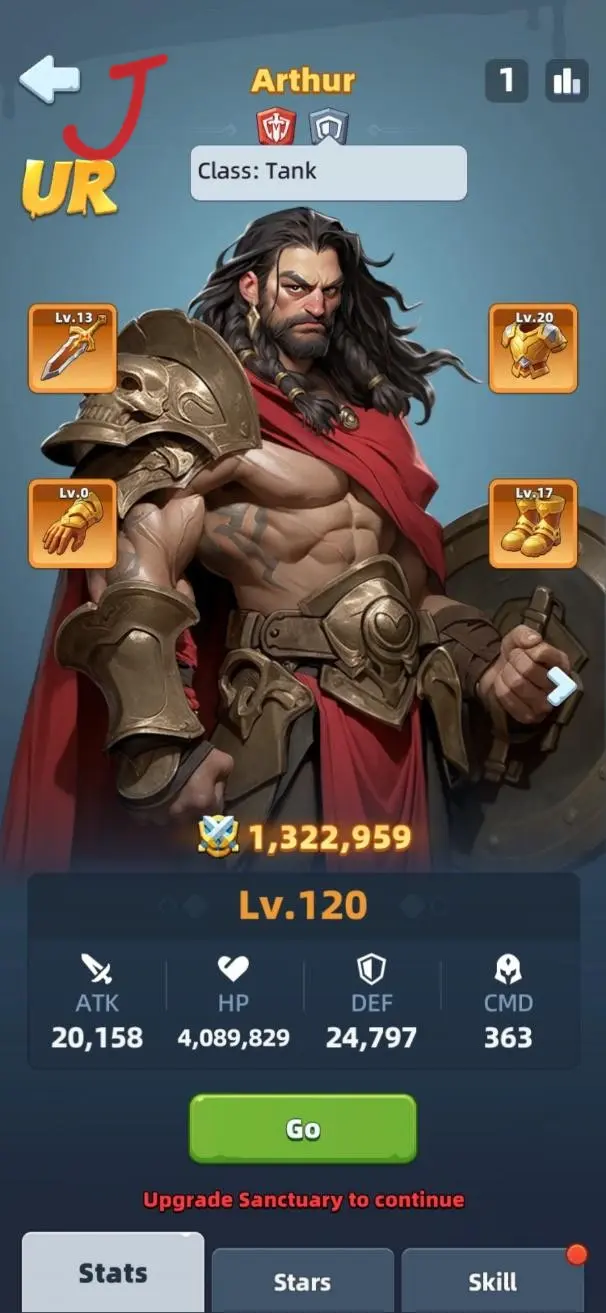
- Tank: Low ATK, high HP, and high DEF. Tanks generally have defensive skills and are designed to absorb damage.
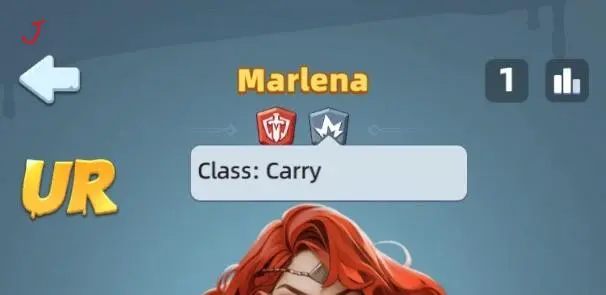
- Carry: High ATK, low HP, and moderate DEF. Carries specialize in dealing damage.
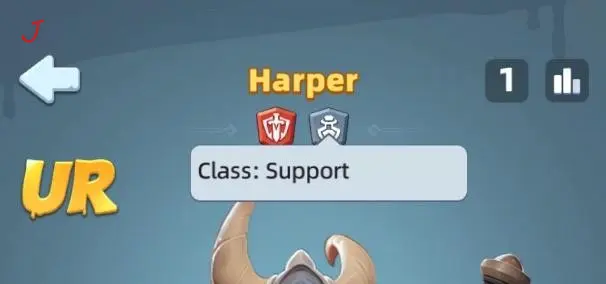
- Support: Moderate ATK and HP, but relatively low DEF. Support heroes use buffs, debuffs, healing, or other utility effects to improve the squad’s performance.
Hero Factions
The three factions are:
- Warrior
- Ranger
- Warlock



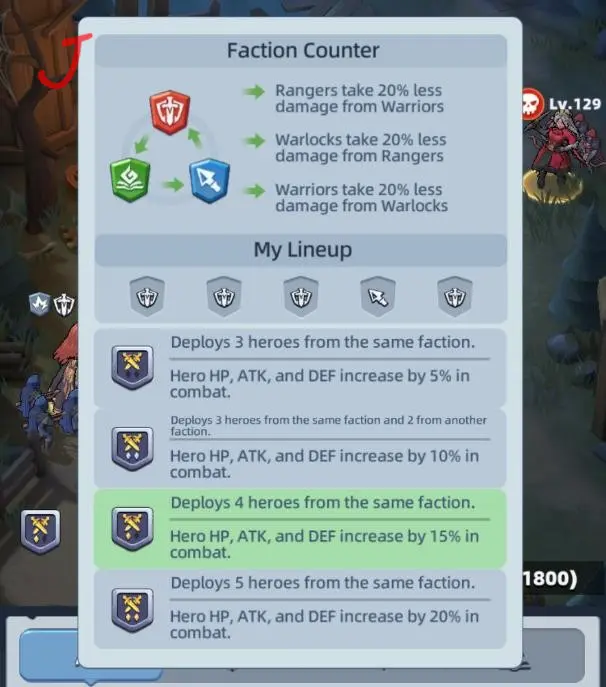
The faction-counter relationship is:
Warrior → Warlock → Ranger → Warrior
A hero takes 20% less damage from the faction it counters:
- Warriors take 20% less damage from Warlocks.
- Rangers take 20% less damage from Warriors.
- Warlocks take 20% less damage from Rangers.
Using multiple heroes from matching factions also activates a lineup bonus that increases ATK, HP, and DEF:
- Three heroes from one faction: +5%
- Three heroes from one faction and two from another: +10%
- Four heroes from one faction: +15%
- Five heroes from one faction: +20%
III. Skills, Damage Types, and Range
Hero Skills
Skills fall into two broad categories:
- Active skills have cooldowns and activate at specific intervals during combat.
- Passive skills remain active continuously or trigger automatically when their conditions are met.
A typical SSR–UR hero has five skills:
- Basic attack: Used whenever the hero is not casting an active skill.
- Ultimate skill: An active skill, commonly with a base cooldown of 15 seconds.
- Secondary active skill: Commonly has a base cooldown of five seconds.
- Passive skill: May provide a permanent effect or aura.
- Bonus skill: A fixed-level passive that affects stats. For UR heroes, it may also affect cooldowns.
Technically, the basic attack is not a passive skill, so the original statement that heroes possess “three passive skills” should be avoided. A clearer breakdown is: one basic attack, two active skills, and two passive or bonus skills.
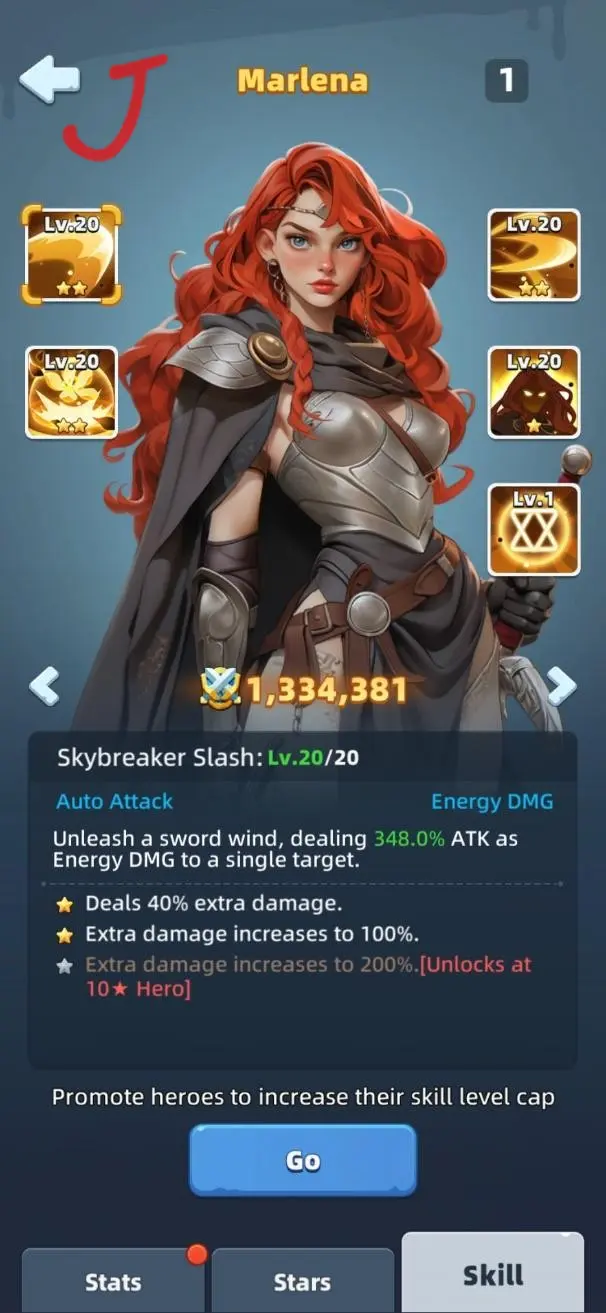
Skills improve in two ways:
- Increasing stars unlocks additional skill effects.
- Increasing skill level with Skill Badges improves the skill’s numerical values.
Damage Types
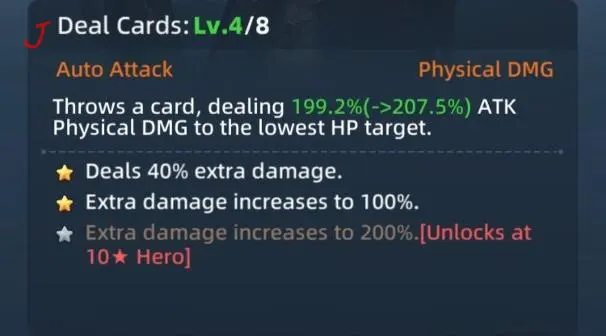
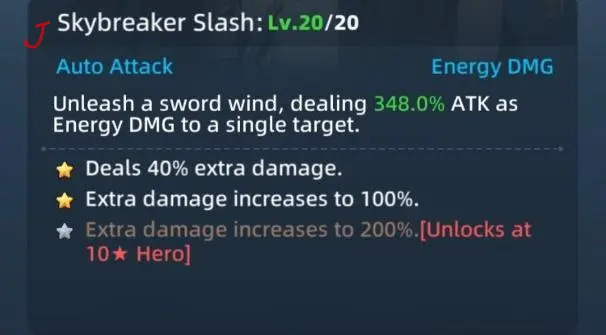
Heroes deal either:
- Physical damage (orange), or
- Energy damage (blue).
Depending on the opponent’s resistances and your squad composition, it may be useful to specialize in one damage type or use a mixture of both.
Attack Range
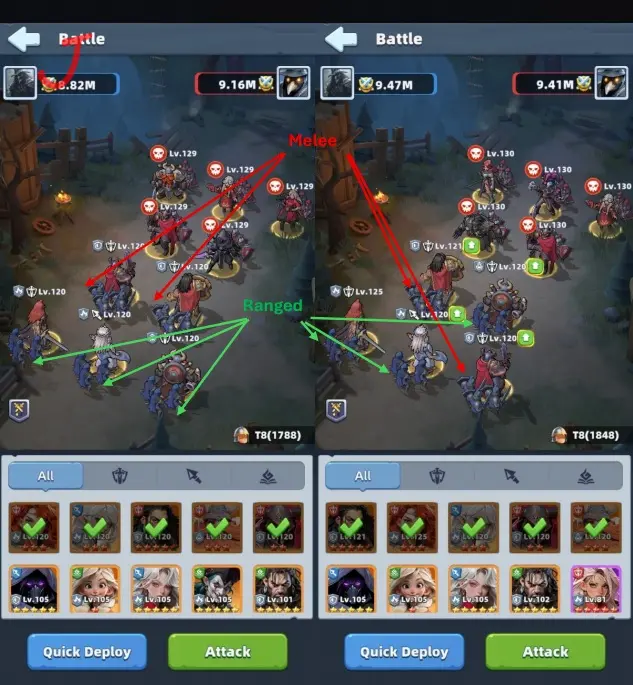
Heroes use either melee or ranged attacks.
All Tanks currently use melee attacks, while Carries and Supports may use ranged attacks. The accompanying soldier type can also indicate attack range:
- Sword-and-shield soldiers indicate a melee hero.
- Bowmen indicate a ranged hero.
Attack range is determined by the hero and is not changed by formation position.
IV. Hero Gear
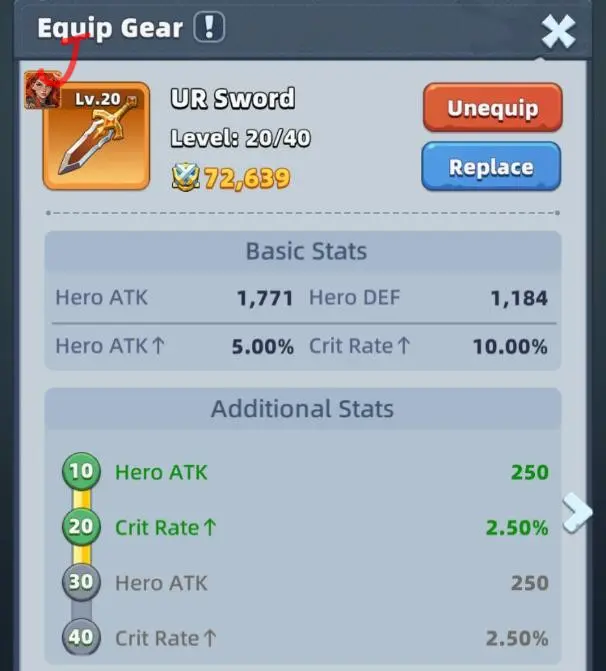
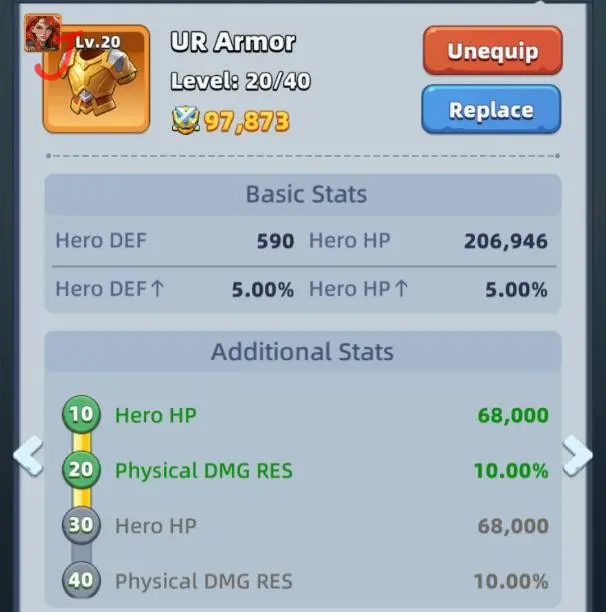
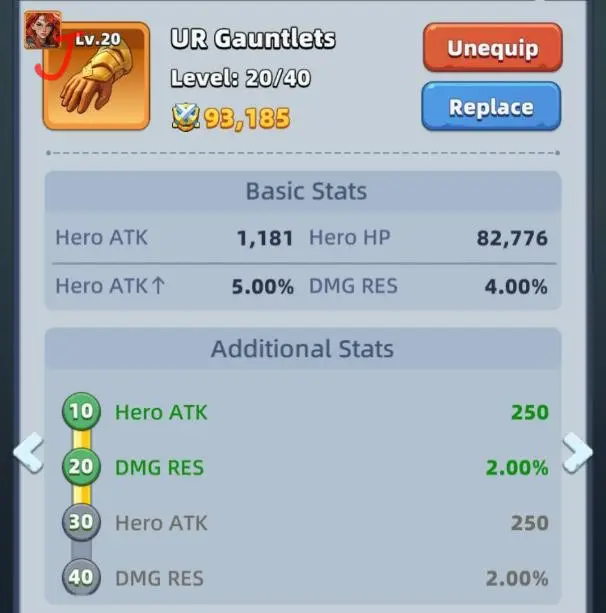
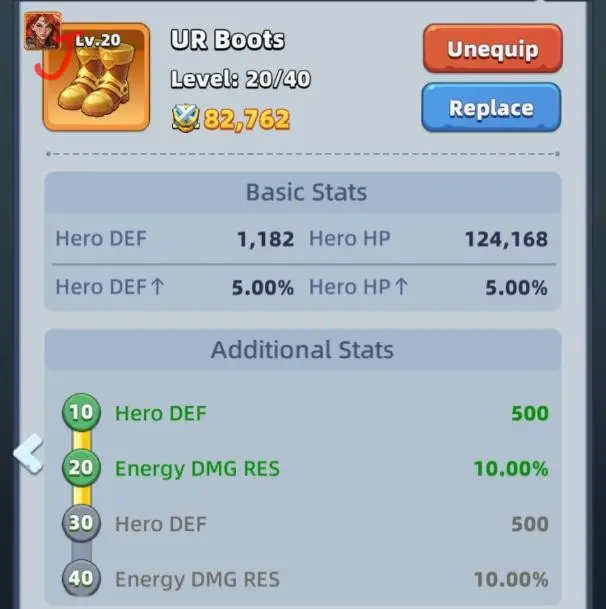
Each hero can equip four pieces of gear. This guide focuses on UR gear because it is the long-term objective; SSR gear should generally be treated as temporary.
| Gear | Primary attributes | Additional attributes |
|---|---|---|
| Sword | ATK and DEF | ATK% and Crit Rate |
| Armor | DEF and HP | DEF%, HP%, and Physical DMG RES |
| Gauntlets | ATK and HP | ATK% and All DMG RES |
| Boots | DEF and HP | DEF%, HP%, and Energy DMG RES |
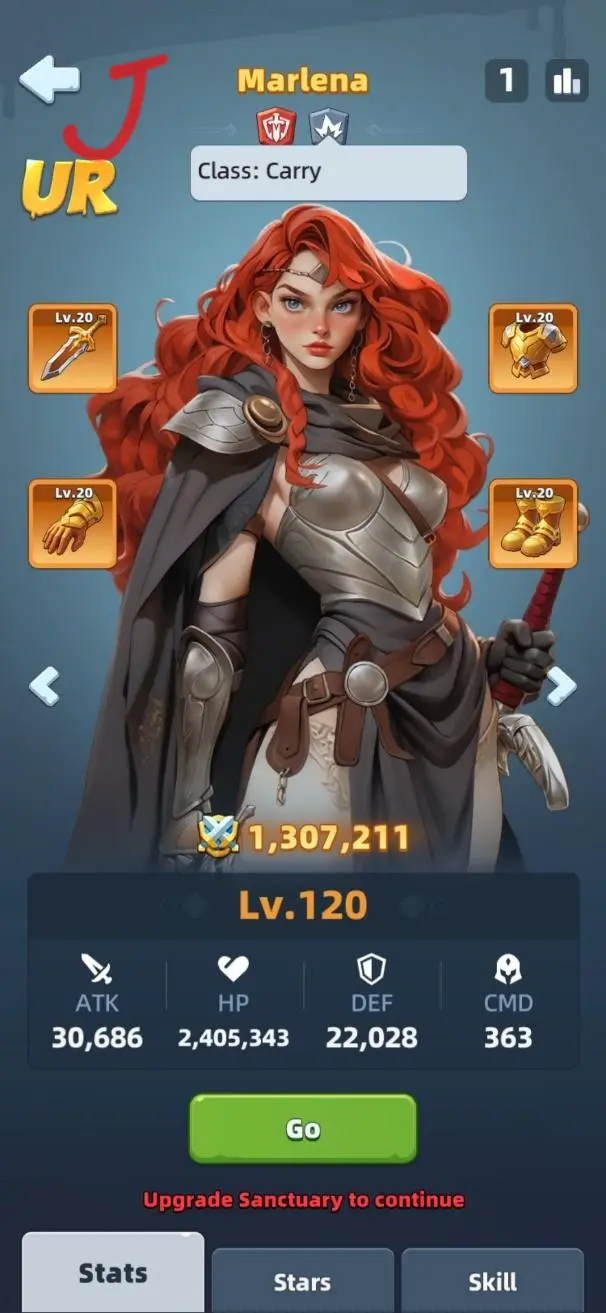
Gear can be upgraded to level 40 with Gearstones and Herbs. After reaching level 40, UR gear can be promoted through five star levels.
Each star promotion has five stages:
- The first four stages consume Gearstones, Tempered Steel, and Herbs.
- The fifth stage consumes Gearstones, Tempered Steel, and a Blueprint instead of Herbs.
- Completing the fifth stage awards the star.
Prioritize gear according to each hero’s role:
- Carries and Damage Dealers: Swords and Gauntlets improve offensive performance.
- Tanks: Armor and Boots improve survivability.
- Supports: The best choice depends on the hero’s skills, but defensive gear will generally help the hero remain active longer.
These are general recommendations rather than absolute rules. A hero’s skills, damage type, and role within the squad may justify a different build.
V. Squad Formation
A squad contains up to five heroes arranged in two rows:
- The front row contains positions 1 and 2.
- The back row contains positions 3, 4, and 5.
Each hero also commands a contingent of soldiers. The size of that contingent is determined primarily by the hero’s CMD stat and other applicable bonuses.
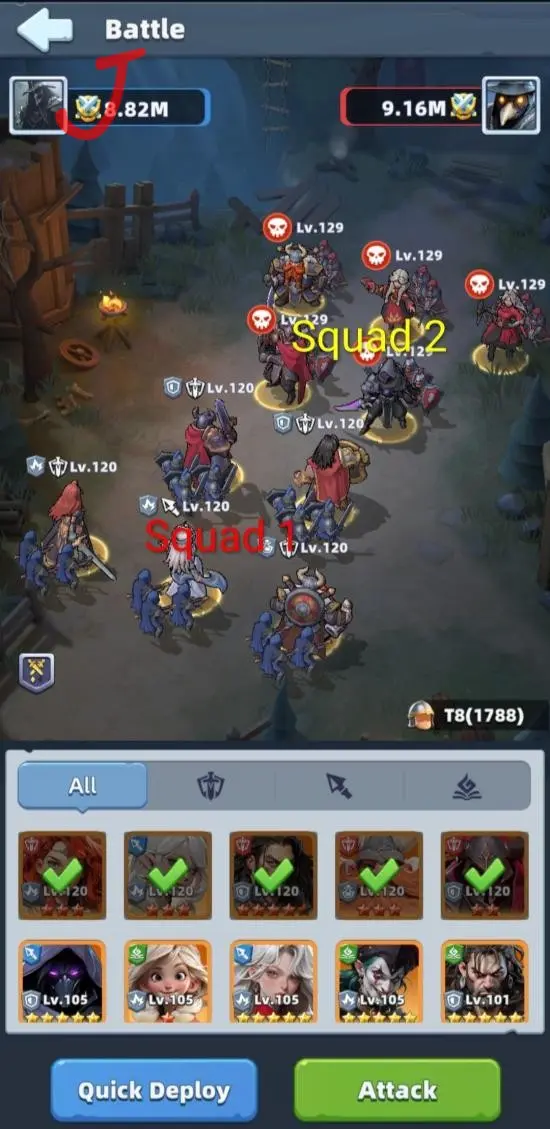
The first number identifies the squad, and the second identifies the position. For example:
- 1-1 means Squad 1, Position 1.
- 2-5 means Squad 2, Position 5.
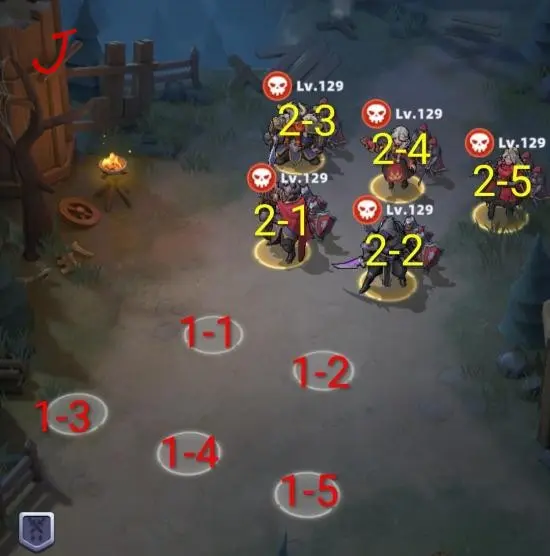
Position affects targeting and determines when a hero is likely to receive damage. Front-row heroes usually engage the enemy first, while back-row heroes remain protected until the front line begins to collapse.
Formation is therefore an important part of squad building. Two squads with identical heroes and similar power can perform differently depending on where those heroes are placed.
VI. Rules of Engagement
This section describes observed targeting behavior during combat. These rules primarily concern basic attacks and may be altered by hero skills, special effects, summoned units, or other mechanics.
Because the exact targeting formula has not been officially confirmed, the following should be treated as a working model based on combat observations.
A. Standard Formation
A standard formation places two melee heroes in the front row and three ranged heroes in the back row.
During combat, each squad appears to divide into two targeting groups:
| Squad | Main group | Secondary group |
|---|---|---|
| Squad 1 | Positions 1-1, 1-3, and 1-4 | Positions 1-2 and 1-5 |
| Squad 2 | Positions 2-1, 2-3, and 2-4 | Positions 2-2 and 2-5 |
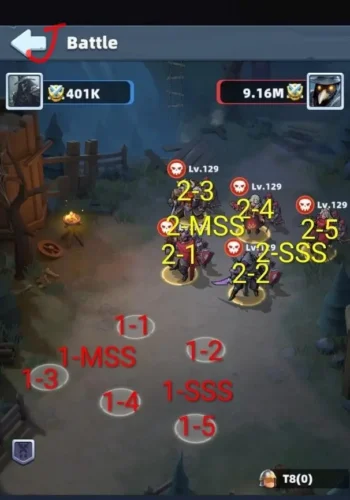
The main group attacks the enemy hero in Position 1, while the secondary group attacks the enemy hero in Position 2:
- Squad 1’s main group attacks 2-1.
- Squad 1’s secondary group attacks 2-2.
- Squad 2’s main group attacks 1-1.
- Squad 2’s secondary group attacks 1-2.
This divides the opening of the battle into two simultaneous engagements.
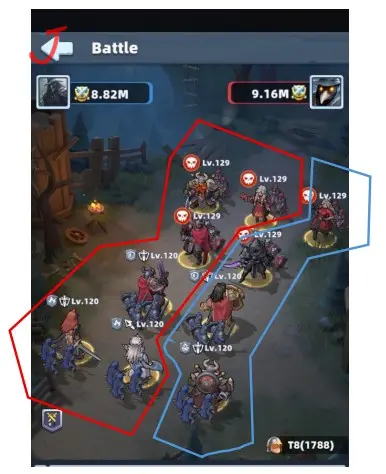
1. Opening Phase
During the opening phase, both front-row heroes absorb attacks from their corresponding enemy groups.
In a standard formation, Position 1 generally receives attacks from three enemies, while Position 2 receives attacks from two.
This makes Position 1 particularly important. It will often require the squad’s most durable Tank.
2. Concentration Phase
The concentration phase begins when one of the front-row heroes is defeated.
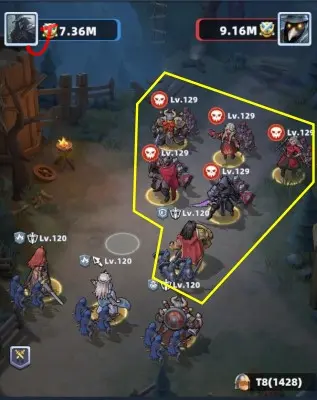
If the hero in Position 1-1 is defeated:
- Squad 2’s main group changes its target to Position 1-2.
- All five surviving heroes in Squad 2 can then concentrate on Position 1-2.
- Squad 1’s targeting pattern does not otherwise change, although its main group has lost one member.
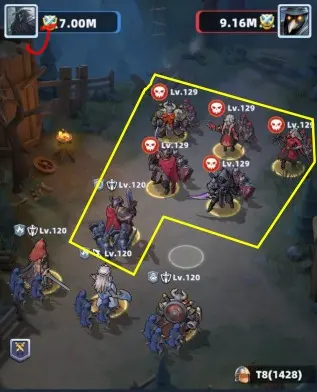
If the hero in Position 1-2 is defeated:
- Squad 2’s secondary group changes its target to Position 1-1.
- All five surviving heroes in Squad 2 can then concentrate on Position 1-1.
- Squad 1’s targeting pattern does not otherwise change, although its secondary group has lost one member.
The same rules apply in reverse when Squad 2 loses a front-row hero.
The first front-row defeat can therefore become the turning point of the battle. Once one Tank falls, the opposing squad may be able to focus nearly all of its attacks on the remaining Tank.
3. Back-Row Engagement Phase
This phase begins after both front-row heroes on one side have been defeated.
The surviving enemies then advance to attack the exposed back row. Observed behavior suggests that back-row heroes begin attacking their counterparts, while surviving front-row heroes engage the heroes in Positions 3 and 4.
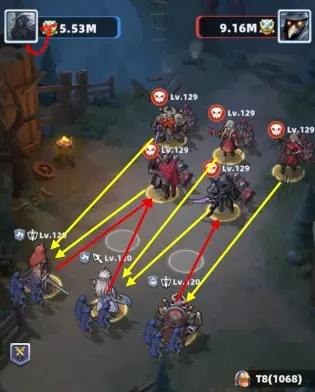
The precise target assignments may vary depending on:
- Which heroes remain alive
- Whether the heroes are melee or ranged
- Hero skills and special targeting effects
- Summoned units or other battlefield effects
A squad that loses both front-row heroes first is usually at a major disadvantage and may be defeated shortly afterward.
B. Three-Melee Formation
A three-melee formation uses two melee heroes in the front row and a third melee hero in the back row.
This formation provides an additional durable hero who can help absorb damage after the front line begins to collapse. It may increase the squad’s overall survivability, but it also requires replacing a Damage Dealer or Support with another melee hero.
Potential advantages:
- Greater overall durability
- A stronger transition after the first Tank is defeated
- More protection against squads that eliminate the front row quickly
Potential disadvantages:
- Lower damage output
- Less support or utility
- Longer battles, particularly if the squad lacks a strong Carry
C. Four-Ranged Formation
A four-ranged formation places one melee hero in Position 1 and a ranged hero in Position 2.
In this arrangement, most of the opposing squad appears to focus on the lone melee hero in Position 1. The enemy hero directly opposite Position 2 may continue attacking the ranged hero placed there.
Potential advantages:
- Allows the use of an additional Carry or Support
- Can produce greater damage or utility
- May overwhelm an opponent before the front line collapses
Potential disadvantages:
- The lone Tank receives extremely concentrated damage
- The ranged front-row hero is more exposed
- Once the Tank is defeated, the formation may collapse quickly
This formation depends heavily on the durability of the hero in Position 1 and the damage output of the four ranged heroes.
D. Ranged Front, Melee Back
Placing a ranged hero in the front row and a melee hero in the back row can change normal movement and targeting behavior.
This arrangement may occasionally be useful when:
- A ranged hero must occupy a particular position for a skill effect
- A melee hero benefits from entering combat later
- The formation is designed to manipulate enemy targeting
- The opposing squad has a specific positional weakness
However, this is not recommended as a default formation. Ranged heroes are generally less durable and may be defeated too quickly when placed in the front row. Meanwhile, a Tank placed in the back row cannot protect its allies effectively during the opening phase.
Further testing is required to document the exact engagement rules for this formation.
IV. Recommended Squad Paths
“Temporary” heroes are intended to be replaced later, so avoid investing beyond the recommended skill level.
A. Free-to-Play Path
The recommended free-to-play strategy is to build a mixed UR/SSR Warrior squad.
| Stage | Availability | Position 1 | Position 2 | Position 3 | Position 4 | Position 5 |
|---|---|---|---|---|---|---|
| Starting lineup | Days 1–7 | Arthur | Bella — temporary; skills ≤ 8 | Claire | Celia — temporary; skills ≤ 12 | Best available SSR, ideally Sivir — temporary; skills ≤ 8 |
| Early game | Days 8–22 | Arthur | Lucius | Claire | Celia — temporary; skills ≤ 12 | Best available SSR, ideally Sivir — temporary; skills ≤ 8 |
| Mid-game | Days 22–65 | Arthur | Lucius | Claire | Celia — temporary; skills ≤ 12 | Harper |
| Late mid-game onward | Day 66+ | Arthur | Lucius | Marlena | Claire | Harper |
Investment Priorities
| Resource | Recommended priority |
|---|---|
| UR shards | Build Arthur and Harper gradually to eight stars. For every shard invested in either hero, reserve one for Marlena. |
| Marlena reserve | Save up to 975 UR shards so Marlena can reach approximately eight stars when she enters the Tavern. |
| After obtaining Marlena | Prioritize Marlena until she reaches the maximum star level. |
| SSR resources | Prioritize Claire and Lucius. |
B. Light-Spender Paths
These paths assume a total investment of approximately US$80. Choose one faction early and avoid changing paths unnecessarily.
| Path | Main advantage | Main drawback | Full lineup available |
|---|---|---|---|
| Warrior | Easiest path; strong in PvE and generally versatile | Vulnerable to Ranger squads during the mid-game | Day 57 |
| Ranger | Particularly strong during the mid-game | Begins with only one primary Damage Dealer | Day 71 |
| Warlock | Distinctive lineup with strong long-term potential | Requires more temporary heroes and takes longest to complete | Day 99 |
1. Warrior Path
Purchase Marlena early. Cynthia can later be obtained through the Roulette event.
| Stage | Availability | Position 1 | Position 2 | Position 3 | Position 4 | Position 5 |
|---|---|---|---|---|---|---|
| Starting lineup | Days 1–7 | Arthur | Bella — temporary; skills ≤ 8 | Marlena | Claire — temporary; skills ≤ 12 | Celia — temporary; skills ≤ 8 |
| Early game | Days 8–21 | Arthur | Lucius — temporary; skills ≤ 8 | Marlena | Claire — temporary; skills ≤ 8 | Cynthia — temporary; skills ≤ 12 |
| Early mid-game | Days 22–28 | Arthur | Lucius — temporary; skills ≤ 8 | Marlena | Cynthia — temporary; skills ≤ 12, or Claire — skills ≤ 8 | Harper |
| Late mid-game | Days 29–56 | Arthur | Daskal | Marlena | Cynthia — temporary; skills ≤ 12, or Claire — skills ≤ 8 | Harper |
| Late game | Day 57+ | Arthur | Daskal | Marlena | Zoya | Harper |
2. Ranger Path
Obtain Cynthia through the Roulette event, purchase Shadow early, and acquire Red Lady and Louis through their respective game passes.
| Stage | Availability | Position 1 | Position 2 | Position 3 | Position 4 | Position 5 |
|---|---|---|---|---|---|---|
| Starting lineup | Days 1–7 | Arthur — temporary; skills ≤ 12 | Bella — temporary; skills ≤ 8 | Ash — temporary; skills ≤ 12 | Celia — temporary; skills ≤ 8 | Bestar, if available — temporary; skills ≤ 8 |
| Early game | Days 8–21 | Arthur — temporary; skills ≤ 12 | Shadow | Cynthia | Ash — temporary; skills ≤ 12 | Bestar — temporary; skills ≤ 8 |
| Early mid-game | Days 22–35 | Arthur — temporary; skills ≤ 12 | Shadow | Cynthia | Ash — temporary; skills ≤ 12 | Harper — temporary; skills ≤ 8 |
| Late mid-game | Days 36–63 | Shadow | Arthur — temporary; skills ≤ 12 | Cynthia | Red Lady | Ash — temporary; skills ≤ 12 |
| Transitional late game | Days 64–70 | Louis | Shadow | Cynthia | Red Lady | Ash — temporary; skills ≤ 12 |
| Final lineup | Day 71+ | Louis | Shadow | Cynthia | Red Lady | Bell |
3. Warlock Path
Obtain Jester through the Roulette event, then purchase Annie, Brian, Billy, and Nicole as they become available.
| Stage | Availability | Position 1 | Position 2 | Position 3 | Position 4 | Position 5 |
|---|---|---|---|---|---|---|
| Starting lineup | Days 1–14 | Arthur — temporary; skills ≤ 12 | Hastar — temporary; skills ≤ 12 | Stellar — temporary; skills ≤ 12 | Celia — temporary; skills ≤ 8 | Claire — temporary; skills ≤ 8 |
| Early game | Days 15–42 | Arthur — temporary; skills ≤ 12 | Hastar — temporary; skills ≤ 12 | Annie | Stellar — temporary; skills ≤ 12 | Jester |
| Mid-game | Days 43–84 | Brian | Hastar — temporary; skills ≤ 12 | Annie | Stellar — temporary; skills ≤ 12 | Jester |
| Late mid-game | Days 85–98 | Brian | Billy | Annie | Stellar — temporary; skills ≤ 12 | Jester |
| Late game | Day 99+ | Brian | Billy | Annie | Nicole | Jester |